Getting a Little Help on Resizing
Our friendly Microsoft Photo Editor can do quite a few things for us to make the images used on the Web more interesting. One of the things it can do very well is resize the image to fit your needs. Let’s say you’re interested in using a small image known as a ‘thumb-nail’ on your Web page. No problem. Open Microsoft Photo Editor and load the image you wish to resize. I will add here though, change the name of the image to something else or your old image will be converted to something smaller. I like to rename my ‘thumb-nails’ to the same name with a ‘-tn’ added to the end of the name. For example, if I had a picture called beach.jpg I would call the ‘thumb-nail’ version beach-tn.jpg. This keeps the pictures together in your files and you can readily see that one is indeed a 'thumb-nail' version.
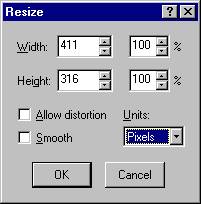
Here is the dialog box to resize my image of a snow-laden tree. I use pixels as a measuring unit for Web pages, for all other times I would use inches.
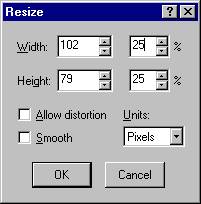
This full size image is over one half of the screen in width, most people use a screen resolution of 800 pixels wide by 600 pixels tall, and this image is 411 pixels wide. Now I want it to be one-fourth the size, I’ll change the percentage to 25%.
So let’s write the code for this new smaller sized image. I want my visitors to be able to click on the image so it will become larger. We will have to write a little more code, it will include some HYPERTEXT as well. Write the following code:
< A HREF="image.gif" > < IMG SRC="image-tn.gif" WIDTH=102 HEIGHT=79 BORDER=1 ALT="Click to see large image of a snow-laden tree" >< /A >
That will do it, just be sure that both images are available on your Web site and you won’t have any missing image links! Have some fun with this.
Page 1 Page 2 Page 3 Page 4 TOP