STEP THREE: LIPS
|
|
Since the eyeballs were such a pain in the ... Here
is a short one... Lips!
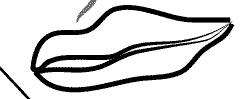
Lips are mostly defined by their stroke. Remember
that I wanted you to use a 'Taper Brush' and start from the right
side and work around the outside. This causes the inside lines to
become thinner, and causes an illusion of lips lightly closed, or
barely parted.
|
|
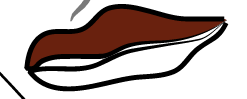
Since the stroke is in place, all we need to do is add color. We
will use a gradient mesh for this technique. Actually two gradient
meshes, one for each lip.
Note on Gradient Meshes: When you convert an object
into a Gradient Mesh, it automatically loses any stroke that it
had. And you can't assign any stroke to it, nor can it be converted
back into a regular path. It becomes a 'strokeless object'. Our
lips cant live without strokes, so we have to fix things. Here is
how: Make a copy of each the upper lip and lower lip prior to making
your gradient meshes. Paste these strokes directly above(EDIT-->PASTE
IN FRONT) the original lip paths that you plan to change into Gradient
Meshes. You will then have separate strokes that won't disappear
when you change the original into a Gradient Mesh.
|
|
If you havent already, select the upper lip path, copy, then
EDIT-->PASTE IN FRONT.
Now lock that path so we can select the one underneath it.
Select the upper lip path that is underneath. First we should
add the undertone of the lip. This will be a dark shade of
red. With the lip path selected, doubl click on the fill box
to bring up the color picker menu and choose a dark red. (I
used #69210E). Choose okay and look at the lip.
It is very flat.Go ahead and drag the fill box color into
the swatches pallete so youll have it if you need it again.
|
 |
|
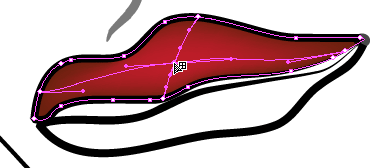 |
In order to create the gradient mesh, first deselect the lip.
Now we will select the color of the overtone. Double click on
the fill color box and choose a brighter, more saturated red
color. (I used #c012da). OK> Now get out the gradient mesh tool.
Simply click in the middle of the lip to apply the mesh. |
|
I went ahead and added one more click to
the left side center.
|
 |
|
|
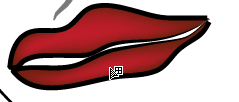
Now similarly for the lower lip:
|
The last thing to do is to fill in the space between her
lips. With the pen or pencil and a black fill, cirle tha area
to be filled. Make sure and put it behind the lips!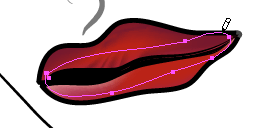
|
|
|
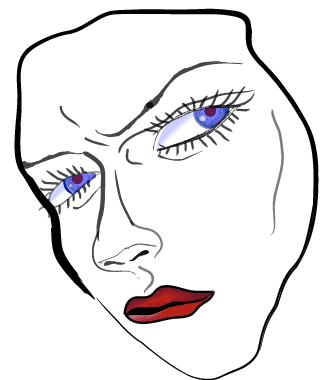
THE FINAL RESULT
|