| | |||||||||||||
Step Four: Face Colors |
|||||||||||||
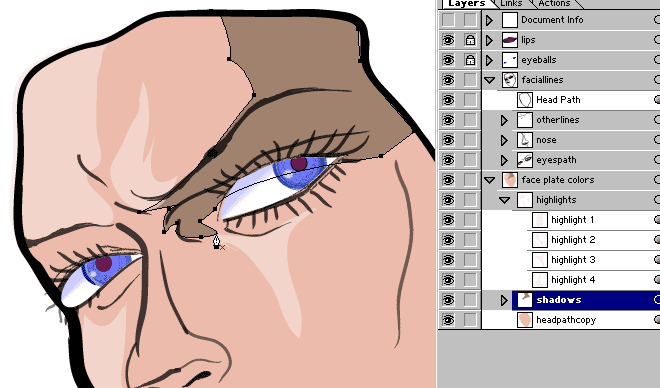
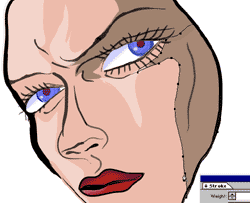
Create Skin ToneFirst off we should create a new Layer set. Call it Face Plate Colors or such. It should be below the Facial Lines layer. First thing to do is select and copy the head outline (The very first stroke we made in this entire illustration). Deselect the stroke, then get on your Face Plate layer and EDIT-->PASTE IN FRONT. We do this so we can preserve the initial facial outline.(We might make slight changes to it later on). We don't need the stroke, but rather the fill. We can turn off this new stroke for now. (We are using this for fill purposes only right now so you can click on the object and then set it to have "no stroke" in the main toolsbar).
Now we will choose her main skintone color. Note: For some reason I called my duplicate head path layer "head path from other". It probably would make more sense as "HeadPath Copy". |
|||||||||||||
Highlights |
|||||||||||||
| NEW LAYER-->Highlights (Organization is important with this many components). | |||||||||||||
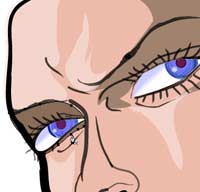
| Highlighting the subject is a simple matter of choosing a lighter shade of your midtone, and shading the proper areas of the face. Choosing the color is the easy part: | |||||||||||||
|
Deselect everything and make sure yor stroke is set
to none. Now click on the fill box and assign your swatch color 'Skintone'
to the fill box.(We want to take our original skin color, and modify it to a slightly lighter shade). Now double click on the fill box to edit it. Simply choose
a lighter shade than your original 'Skintone' and click ok (I used #F7E2DC).
Once again drag your fill box into the swatches pallette and name your
new color 'Skin Highlight'. This is basically the same color as the main skin color, only a little lighter.
|
|||||||||||||
|
|||||||||||||
Shadows |
|||||||||||||
| NEW LAYER-->Shadows | |||||||||||||
|
Again, pick the color you are going to use, and save it in your swatch pallette as 'Skin Shadow' (I used #A0826E). As with the highlights, we will use the original skin color, and modify its lightness. With nothing selected, assign the 'Skintone swatch as the fill color. Double click the fill color box and alter it to a darker shade. This is the secret of shadows. They will carry the same actual color as the midtone, but with less reflective energy(darker tone). Let us take a moment to think about where shadows might be found. Perhaps behind protruding areas such as the nose and lip? Maybe in places that are set deeper back such as the eye socket area? The opposite side of the face from the highlights? Good thinking! |
|||||||||||||
|
|||||||||||||
|
|||||||||||||
|
|||||||||||||
|
|||||||||||||
|
Once you get the shadows, we are done with this section! |
|||||||||||||
|
|||||||||||||