PowerPoint97 Module 3
Working with Drawing Objects
Insert Information using Text boxes, Drawing Tools and AutoShapes :
Text box - a box that holds slide text where you type and later format to modify the text style.
Drawing Tools - graphics-related tools to insert art and draw pictures inside your slides, easy to use and show themselves (along with their toolbars) when you request them :

AutoShapes - inserts one of the ready-made shape, which you can manipulate such as resize, rotate, flip, colour, and combine with other shapes eg. lines, Basic shapes, Flowchart, Stars and Banners etc.
In
addition to meaningful text, an effective presentation also includes
shapes and pictures that complement and enhance the message.
Sometimes, you may need to format your presentations (modify
individual slides when needed) by mastering
PowerPoint design and editing tools, for example :
Slide
Layout
- a single slide's format and design.
Continuing
Project
1.ppt
Click
<Insert>
<New Slide>
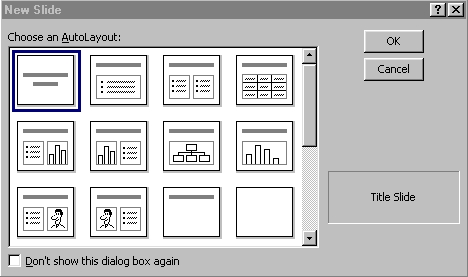
Select
<Blank
AutoLayout>
Drawing and Modify a Shape
PowerPoint comes with a set of ready-made Autoshapes that you can insert into a document. Autoshapes include complex shapes, block arrows, flowchart symbols, stars and banners, and callout ballons.
The shapes you draw, the pictures you import from other programs, and the text you type are all examples of objects. You can resize, copy, paste, moving, cutting, and deleting are editing commands you can use on any object
Get Drawing Tools :
Menu, Point and click <View><Toolbars> : click Drawing

Click <AutoShapes>
button on the Drawing toolbar
Point to the <Stars And banners> at the Autoshapes menu
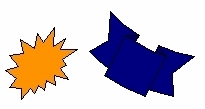
Click <Explosion
2> button
You
can use the white squares called Resize handles to size
the object.
Click <Fill
Color> down select orange

Position
the object on the left side of the presentation slide
Click
<AutoShapes>
button on the Drawing toolbar
Point to the <Stars And banners> at the Autoshapes menu
Click <Curved
Down Ribbon> button
You
can use the white squares called Resize handles to size
the object.
Click <Fill
Color> down select dark blue

Position
the object on the right side of the presentation slide
Click
<Free
Rotate> button on the Drawing toolbar
Click the top-left rotate handle and drag it up
Click
<Insert>
<New Slide>
Select
<Blank
AutoLayout>
Select the
Arrow object
Drag Resize
handle to the right.
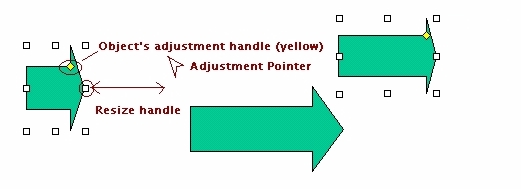
Drag Object's
adjustment handle (yellow
diamond)
to the right.
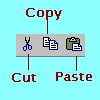
Copying and Moving an Object
You can copy a selected object or multiple objects to the Windows Clipboard and then paste the objects in other parts of the presentation.
Copy & Paste, Cut & Paste

Alternatively
Press <Ctrl> <Click> at the object.
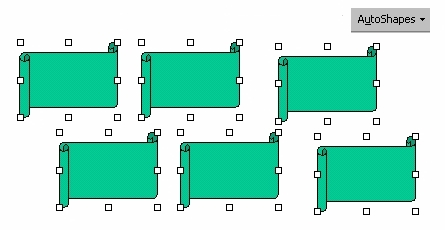
Changing the Shape of an Object
If you created an object using an Autoshape, PowerPoint allows you to change the shape to another shape with one easy command.
Use the Same Slide
<Shift> + Click Select all the arrows objects
Click <Draw> button
Select <Change Autoshape> option
Select <Stars and Banners>
Modify Object Attributes
Objects have attributes that define how they appear on the slide - fill, line, shape, and shadow. The text attributes are style, font, colour, embossment, and shadow.
Click <Insert> <New Slide>


Select <Blank AutoLayout>
Select <Ribbon> object
On the Drawing toolbar,
Click <Fill Color> menu
Select <Fill Effects>
Click <Texture> tab
Click <Blue Tissue Paper textured fill>
(first in the third row)
Click <OK>
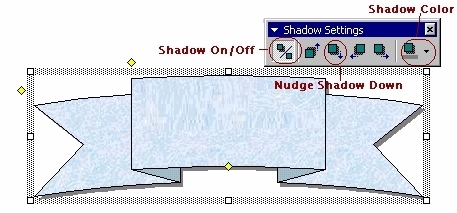
Click <Shadow> button
Select <Shadow Style 6> button
Click <Shadow> button
Click <Shadow Settings> toolbar
Click <Nudge Shadow> down button (x5)
Click <Shadow Color> button
Select <Semitransparent Shadow>
The shadow color changes to semitransparent, which allows the background to show through.
Close <Shadow Settings> toolbar
Aligning Objects
PowerPoint uses two fundamentally different ways of aligning a group of objects : you can align objects to each other, or you can align them to a guide.
<Shift> + Click Select two objects
Click <Draw>
Select <Align Or Distribute>
Click <Align Center>
Alternatively
Click <View> Click <Guides>
Drag the Guides to the left
Click <View> Click <Guides>
Disable the Guides
Adding 3-D Effects to Objects
Once you draw an object, you can change the object to look 3-dimensional.
Click <3-D> button Click <3-D Style 6>
Click <3-D> button Click <3-D Settings>
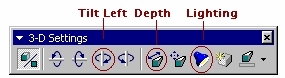
Click <lighting> button
Click <third Lighting Direction> button
Click <Tilt Left> button (x5)
Click <Depth> button Click <144 pt.>
Close <3-D Settings> toolbar
Changing Object Stacking Order
Stacking is the placement of objects one on top of another. The first object you draw is on the bottom, and the last object you draw on top. You can change the placment of the objects by using the Bring To Front, Send To Back, Bring Forward, and Send Backward commands.
Click <Draw> button
Click <Order> Click <Bring To Front>
Rotating and Flipping Objects
Once you create an object, you can change its orientation on the slide by rotating or flipping it. Rotating turns and object 90 degrees to the right or left, flipping turns an object 180 degrees horizontally or vertically.
Click <Draw> button
Click <Rotate Or Flip>
Click <Flip Horizontal>
Grouping and Ungrouping Objects
Objects can be grouped together, ungrouped, and regrouped in PowerPoint to make editing and moving information easier. You can group the objects and move them all together - as one object.
<Shift>+Click Select two objects
Click <Draw> button
Click <Group>


Click <Draw>
button
Click <Ungroup>
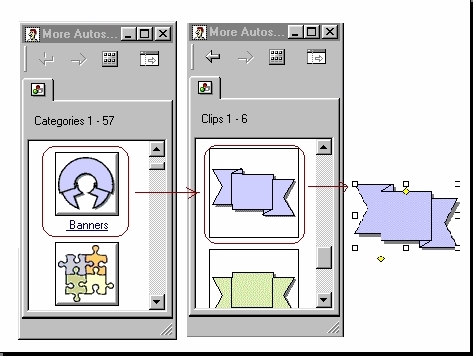
Adding AutoShapes from the Clip Gallery
You can use the More AutoShapes command on the AutoShapes menu to open the Clip Gallery.
Click <Insert> <New Slide>
Select <Blank AutoLayout>
Click <Draw> button
Click <AutoShapes> button
Click <More AutoShapes>
Click <Banners> category
Select <Sharp Ribbon> list
Click <Sharp Ribbon> shape
Click <Insert Clip> icon at the top

Practice
Exercise
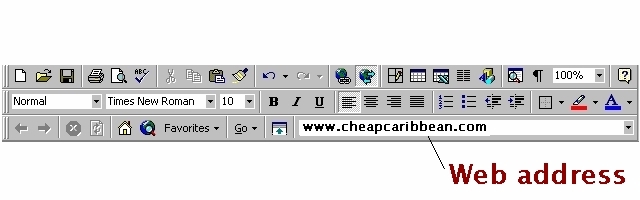
To continue for the My PowerPoint Project presentation, let's tour the Caribbeans to collect pictures from www.cheapcaribbean.com
Internet Explorer Interface :
Menu, Point and click <View><Toolbars> : click Web
Point to each picture in the web page
(i)
right-click to display
the short-cut menu;
(ii) left-click to <Save
Picture As>;
(iii) change the name of the file (optional)
and left-click to <Save>
at <My Documents>, <My Pictures> folder.
Insert any Picture(s) from <My Documents>, <My Pictures> folder to the slide(s).
Your
presentation slide title order :
MS
PowerPoint 2000 Project 1 (Slide Title)
Our
Tour to the Caribbeans
Slide
2 :
Puerto Rico
Slide
3 :
Jamaica
Slide
4 :
Thank You
Save the presentation Project
1 in
the
<My
Documents>
folder.
 Edwin
Koh : We
completed on the
Edwin
Koh : We
completed on the
New
Knowledge and Skills in
MS
PowerPoint97 Module 3.