PowerPoint97 Module 5
Working with ClipArt & WordArt
Insert Information using Files, Clip Arts, Microsoft Clip Gallery :
File - lets you insert an image from any graphics file.
Menu, Point and click <Insert>, <Picture>, <From File> : click
Clip Art - a graphic image you can place on a slide.
Menu, Point and click <Insert>, <Picture>, <Clip Art> : click
Mircosoft
Clip Gallery
- a collection of clip art images arranged by subject, include
picture, video and sound clip files.
Inserting and Modifying a Picture
You can insert nearly any picture, scanned photograph, line art, photo, or artwork from a CD or other program into a slide. Using the Picture submenu or the Insert menu, you can insert pictures in a slide from a file, Clip Gallery, or a scanner.
Click <Insert> <New Slide>
Select <Blank AutoLayout>
Click <Insert> Click <Picture>
Click <From File>
In the list of files from <My Documents> folder, Select any image
Click <Insert>
Enlarge the picture by resizng the corner resize handles

Click <Image Control> button on the Picture toolbar
Click <Watermark>
Click <Less Brightness> button twice
Click <More Contrast> button twice
Insert a Clip Art Image
PowerPoint provides hundreds of professionally designed pieces of clip art. To add a clip art image to a slide, you can use an AutoLayout with a clip area placeholder and double-click the placeholder, you can click Insert Clip Art on the Drawing toolbar, or you can point to Picture on the Insert menu and then click Clip Art (opens
the Microsoft Clip Gallery).
(opens
the Microsoft Clip Gallery).
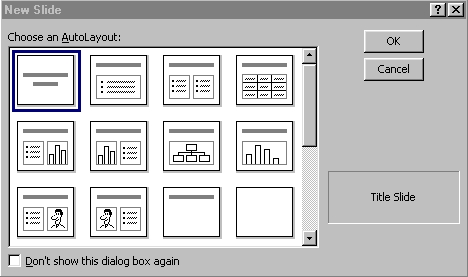
Click <Insert> <New Slide>
Select <Blank AutoLayout>
Menu, Point and click <Insert>, <Picture>, <Clip Art> : Click
The Microsoft Clip Gallery appears
Click <Gestures> category
Find out the list of clip arts Click <Back>
Click <Nature> category

Select the flag on a hill object
Click the Insert Clip button
The clip art image is selected on the slide, and the Picture toolbar opens.
Moves to the bottom of slide
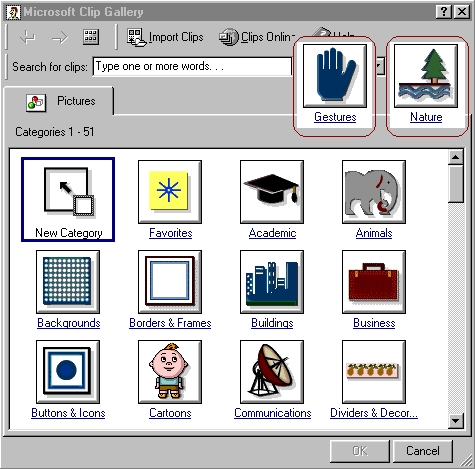
Click <Insert>
Select <Picture>
Click <Clip Art>
Select Special Occasions picture category
Click the blue and yellow firecracker picture

Click <Insert Clip> button
Close <ClipArt> window
Resizing a Picture
After inserting a picture into a Word document, you can easily increase or decrease the size of the picture. When selected, a picture displays eight sizing handles (small white or black boxes) around its perimeter.
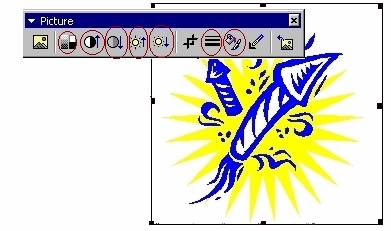
Click <Firecracker> picture object
Note on the eight, black sizing handles appearing around the perimeter of the picture, and the Picture toolbar appears
Resize the object by about half the orginal size by dragging the sizing handles
Click <Print Preview>
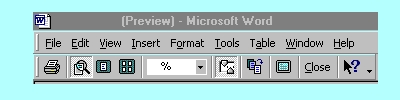
Click <Close> at Print Preview toolbar
Repositioning a Picture
To poistion a picture in relation to the paage, the paragraph, or another anchor, select the item that you want to reposition.
Click <Firecracker> picture object
Click <Format> Click <Picture>
Click <Size> tab
Select <Lock aspect ratio>
Select <Relative to original picture size>

Click <OK>
Click <Firecracker> picture object
Click <Format> Click <Picture>
Click <Picture> tab

Contrast and Brightness
Scale an Image
Scaling resizes an entire object by a set percentage.
Select any clip art image
The picture toolbar appears
Click <Size> tab
Type 120 at the Height box
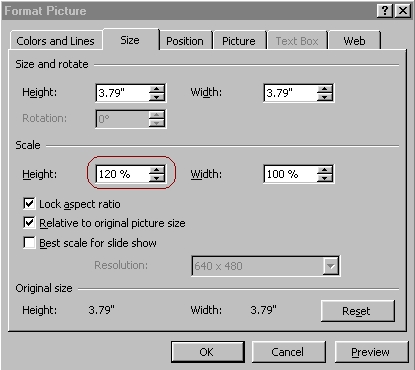
Click <OK>
The Lock Aspect Ratio check box is selected, the Width option setting wil also automatically change to 120% when you click OK.
Recoloring a Clip Art Image
You can recolor clip art images to create a different look or to match the current colour scheme
Select any clip art image
The picture toolbar appears
Click <Recolor Picture> button
Click <down> arrow
A colour menu appears
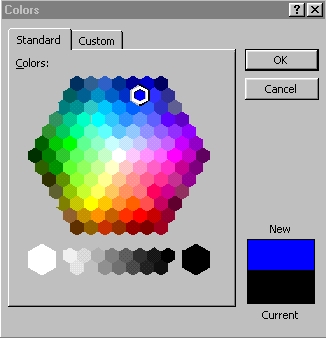
Select dark blue colour (Follow Accent Scheme Color) box
Click <OK>
Inserting and Modifying WordArt
You can insert fancy or stylized text into a presentation with WordArt.

 (opens
the Microsoft Clip Gallery).
(opens
the Microsoft Clip Gallery).


WordArt - lets you convert text into shapes
Click
<Insert>
<New Slide>


Select
<Blank
AutoLayout>
Click <View>
Click <Toolbars>
Click <Drawing>

Click <Insert
WordArt> button

The
WordArt toolbar appears

Type Welcome
to My Tour<Enter>

Click
<OK>
Click <Fill
Color> buttom on the Drawing toolbar
Click <Fill
Effects> at the color palette

Click <OK>
Alternatively
Menu,
Point and click <Insert>,
<Picture>, <WordArt> : click
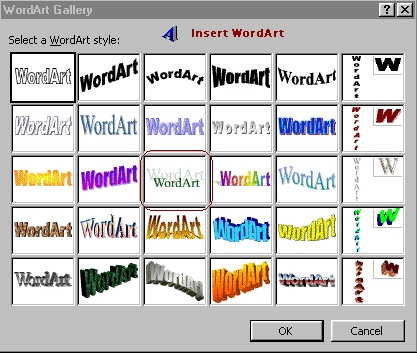
Select
<Style>
in third column, third row
Click
<OK>
Click <Format
WordArt> button
Click <Colors
And Lines> tab
Click <Color>
down arrow in the Fill section
Click dark blue (Follow
Accent Scheme Color box)
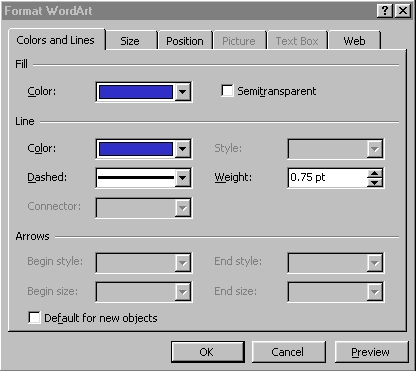
Click <Color>
down arrow in the Line section
Click dark blue (Follow
Accent Scheme Color box)
Click <OK>
Practice Exercise
 Edwin
Koh : We
completed on the
Edwin
Koh : We
completed on the
New
Knowledge and Skills in
MS
PowerPoint97 Module 5.