PowerPoint97 Module 8
Others
(Optional)
Changing Design Templates
When you apply a template to a presentation, PowerPoint copies the information from each master in the template to the corresponding masters in the presentation. All slides in a presentation will then acquire the look of the template.
Click <Apply Design>
Select Fans

Click <OK>
Change Slides Background
You can create a special background by adding a shade, a texture, a pattern, or even a picture to slides.
Click <Format> <Background>

Click Background Fill down area
Select <More Colors>


Creating a textured background
Select <Fill Effects>

<Texture> tab
Others : Gradient, Pattern,
Picture (select image as the Background)
Click <OK> <Apply>
Changing Slide Layouts
When you change a slide layout to a presentation, PowerPoint changes the arrangement of the position of the information in the slide.


Click
<Slide
Layout> 
Create Graphics file(s)
Menu, Point and click <File>: click Save As
Windows
Metafile
JPEG Filter
Gif Filter
Portable Network Graphics (PNG)
Send a Presentation Via E-mail
You can send a presentation over either a local network or the Internet by using an e-mail program, such as Microsoft Outlook or Microsoft Outlook Express.
Microsoft Outlook Interface :
Menu, Point
and click <View><Toolbars>
:
click
Reviewing

Click
<Send>
button
Send e-mail with attached file
Alternatively
Click <File> <Send
To>
<Mail Recipient (as Attachment)>
Use the PowerPoint Viewer
PowerPoint comes with a special program - PowerPoint Viewer - which allows you to show a slide show on a computer that does not have PowerPoint installed.
Insert the Microsoft Office 2000 CD or Microsoft PowerPoint 2000 CD -
Directory :\MSOFFICE\OFFICE\XLATORS

Double-click the Ppview32 file
Use the Pack And Go Wizard
If you need to transport your presentation to another computer, you can use the Pack And Go Wizard to compress and save the presentation to a floppy disk. With the Pack And Go Wizard, you can include linked files and fonts that are used in the presentation.
Click <File> <Pack And Go>

Click <Next>

Click <Finish>

You are now ready to ready to install to the remote computer.


Insert and Outline from Microsoft Word
PowerPoint can insert outlines created in other programs in Word 95 or Word 97 (setup with outline heading styles) into a presentation outline. PowerPoint creates slide titles and paragraphs based on the heading and paragraph text indent levels.
Default (Normal) view of Word 97 document

Outline view of Word 97 document

PowerPoint Core Lesson 4 : Word Document
Click <Insert> <Slides From Outline>
Select <Look in:> list
Open <PowerPoint Core Practice> folder
Click 04 Marketing Outline.doc
Click <Insert>

Insert slides from other presentations
You can save time while creating a presentation by using slides that you or someone else has already made by inserting slides.
PowerPoint Core Lesson Sample File 2
Click <Insert> <Slides From Files>

Select and Click <Insert>
Click <Close>
Insert a Microsoft Excel Chart
PowerPoint simplifies the process of inserting an Excel chart into a presentation as an embedded object (direct connection to data in the source program) in the slide.
To save the file, you can link an object ("link" back to the original document or source document).
Click <Insert> <New Slide>

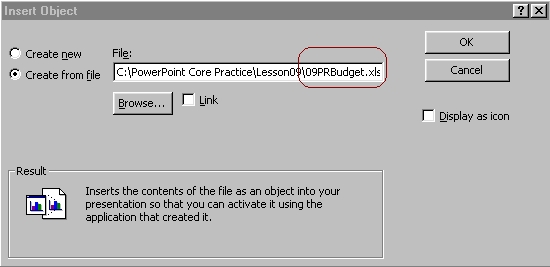
Click <Insert> <Object>
Select <Create from File:> option
Click <Microsoft Excel Chart>
Click <Browse>
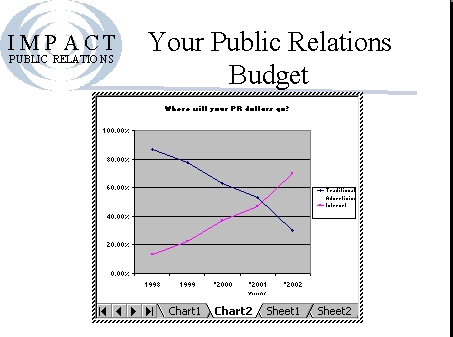
In the list of files, Click 09 PR Budget.xls
PowerPoint Core Lesson 9 : Excel Spreadsheet1


Click <OK>

PowerPoint
embeds the chart (a bar chart) into the new slide
Double-click the embedded
Excel chart
Excel opens and displays the Chart1 worksheet.
Note : The Standard and Formatting toolbars change to the Excel
toolbars, and the Excel Chart toolbar appears.
Click <Chart2>
worksheet tab
Click a blank
area of the slide to exit Excel
Final
Project
PowerPoint
Final Project
 Edwin
Koh : We
completed on the
Edwin
Koh : We
completed on the
New
Knowledge and Skills in
MS
PowerPoint97 Module 8.