PowerPoint Topic 6
More
PowerPoint Features
Create a New Chart
Microsoft Graph is a program that PowerPoint uses to insert a chart in a presentation slide (becomes an embedded object in the slide).
You can create a chart presentation from scratch (Blank template from the New Slide dialog box selection).
Click <Insert> <New Slide>

Select <Chart AutoLayout> Slide
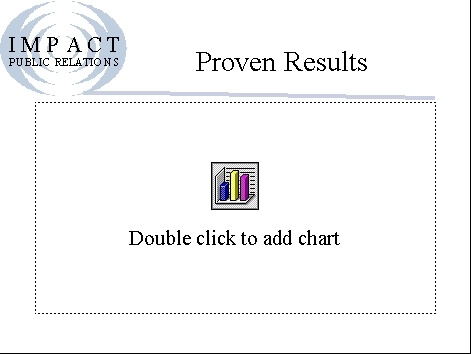
Type Slide title : Proven Results
Double-click the chart placeholder
PowerPoint launches Microsoft Graph
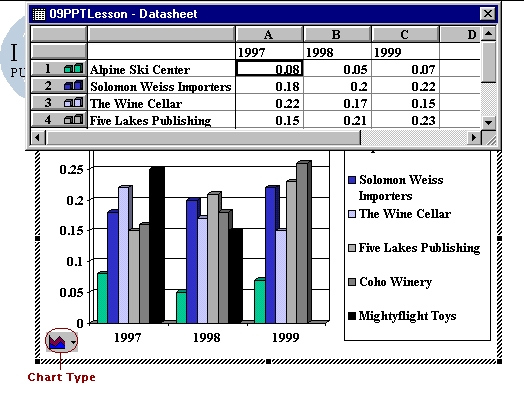
Changing Chart Values
To type in new text or value, delete the entire datasheet
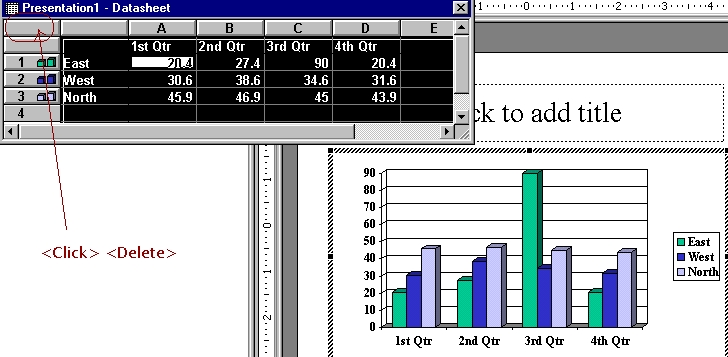
Type the data in the datasheet
Changing the Chart Types
Click <Chart>
Click <Chart Type>

Select <3-D Bar Chart>
Click <OK>
Add Chart Title
Click <Chart>
Click <Chart Options>
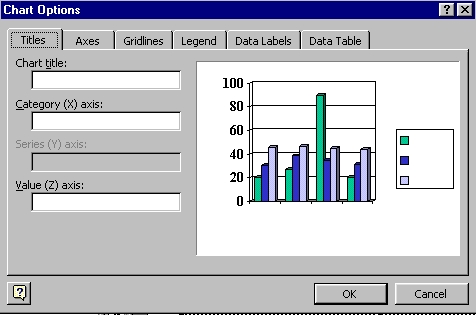
Type Sales Report at <Chart title:> box
Changing the Color of Selected Data Series
Double-click any column in the chart
Click <Format>
Click <Selected Data Series>
Click <Patterns> tab
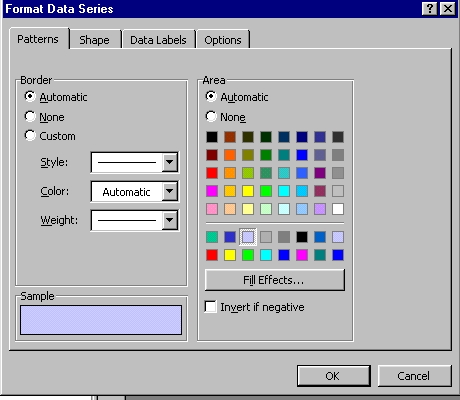
Click <Fill Effects> tab to specify a fill effect
Select the options for Gradient, Texture, Pattern, Picture.
Click <OK>


Linking
Linking allows you to link to websites or you can link to objects created in other porgrams.
Linking to an Object : Microsoft Excel Chart
PowerPoint simplifies the process of inserting an Excel chart into a presentation as an embedded object (direct connection to data in the source program) in the slide.
To save the file, you can link an object ("link" back to the original document or source document).
Click <Insert> <New Slide>
Click <Insert> <Object>
Select <Create from File:> option
Click <Microsoft Excel Chart>
Click <Browse>
In the list of files, Click 09 PR Budget.xls
PowerPoint Sample File : Excel Spreadsheet
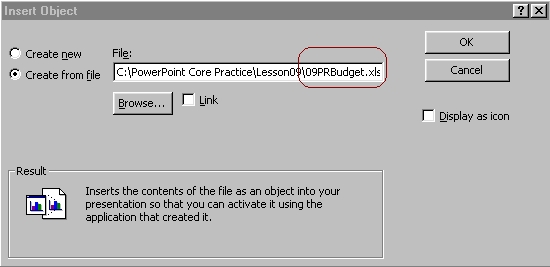
Click <OK>

PowerPoint
embeds the chart (a bar chart) into the new slide
Double-click the embedded
Excel chart
Excel opens and displays the Chart1 worksheet.
Note : The Standard and Formatting toolbars change to the Excel
toolbars, and the Excel Chart toolbar appears.
Click <Chart2>
worksheet tab

Click a blank
area of the slide to exit Excel
Branching
Branching allows you to move to slides which are hidden in your presentation.
During a PowerPoint slide show, you can use the Action Settings command to create a Branch that jumps to another slide, a different presentation, or a Web site.
Click <Slide View> pane
Select any Slide Select text
Click <Slide Show>
Click <Action Settings>
Click <Hyperlink to :> option
Select Slide
Select Slide Title list
Click Slide title : xxx Click <OK>

Click <Slide Show> button
Move the mouse, hyperlink to text Relax
The slide show branches to another Slide
Create an Action Button : Branching
Powerpoint provides a set of predefined navigation buttons, such as Home, Help, information, Back, Next, Beginning, End, and Return - known as action buttons.
Click <View> <Master> <Slide Master>
Click <Slide Show> <Action Buttons>
Select and Click <Home> button

Position the cross-hair pointer
in the lower-right corner of the slide
Set to First Slide at the Hyperlink to:
Select Slide Projector at the Play sound:
On the Drawing Toolbar,
Click <Fill Color> button Click <No Fill>
Master toolbar Click <Close>
Click <Slide Show> button
Click <Home> button
The slide show branches to Slide 1 or
home page, and the slide projector plays


Working with Information from Microsoft Office Programs
PowerPoint
allows you to use text from other programs to create and insert
new slides for existing presentation, or to create entirely new
presentations. The imported information can then be formatted
and transformed into slides (using the Slide Master).
Insert an Outline from Microsoft Word
PowerPoint can insert outlines created in other programs in Word 97 or Word 2000 (setup with outline heading styles) into a presentation outline. PowerPoint creates slide titles and paragraphs based on the heading and paragraph text indent levels.
Default (Normal) view of Word 2000 document

Outline view of Word 2000 document

PowerPoint Core Sample : Word Outline Document
Click <Insert> <Slides From Outline>
Select <Look in:> list
Click <Insert>


Insert Slides from Other Presentations
You can save time while creating a presentation by using slides that you or someone else has already made by inserting slides.
PowerPoint Lesson Presentation Sample
Click <Insert> <Slides From Files>

Select and Click <Insert>
Click <Close>
PowerPoint Pack And Go
If you need to transport your presentation to another computer, you can use the Pack And Go Wizard to compress and save the presentation to a floppy disk. With the Pack And Go Wizard, you can include linked files and fonts that are used in the presentation.
Click <File> <Pack And Go>

Click <Next>

Click <Finish>

You are now ready to ready to install to the remote computer.


Use the PowerPoint Viewer
PowerPoint comes with a special program - PowerPoint Viewer - which allows you to show a slide show on a computer that does not have PowerPoint installed.
Insert the Microsoft Office 2000 CD or Microsoft PowerPoint 2000 CD -
Directory :\MSOFFICE\OFFICE\XLATORS

Double-click the Ppview32 file

Review Exercise :


 Edwin
Koh : We
completed on the
Edwin
Koh : We
completed on the
New
Knowledge and Skills in
MS
PowerPoint 2000 Topic 6.