There is much hype on the quality of new motors used in expensive locomotives, but very little data on their true performance or ratings. Over the years, there have been claims and arguments about the superiority of one type of motor over another. But to my knowledge, no one has proven any of these to be factual. Many have been mislead by so-called experts, who have expounded on second hand statements; resulting in disappointment. With the development of DCC, there has been too much stress on low current draw to meet the limitations of modules. But what is the current at desired operating torque and power in road operation?
A motor drawing .2 amp @ 12 volt with a very high, 80% efficiency would produce 1.92 watt output. This is barely enough to handle a small HO switcher with a few cars, excluding gear train losses. The final decision should rest on the marriage of the proper gear train and a well fitting motor to supply the speed and drawbar pull at the desired voltage. The current will fall where it may; hopefully within the maximum motor rating.
One of the main instigations for this development is to compare some of the expected improvements in motors with new NdFeB magnet replacements against the original and others on the market. Others may be enticed to fabricate a dynamometer to extend testing data. Although this can not be considered a high precision, calibrated device, the relationships among motors should be accurate enough for comparisons and selection. With only a small motor sample, results can only be close approximations to published data. Most do not state whether the data is typical or minimum and what the variation range is. To this end, this device will permit relative comparisons to be made under constant conditions.
As seen in the GENERAL DISCUSSION OF MOTORS and the GRAPHICAL ANALYSIS , all parameters are referenced to the torque, due to methods used. But measuring torque presents a problem. Today there are many very expensive, fancy methods with extremely accurate results, beyond the requirements for the motors used in modelling. Most found examples are for large motors, particularly automotive.
Used to measure the output of a prime mover (motor or engine), an electric motor dynamometer consists of three parts: a brake to measure torque applied as a resisting force to the shaft, a tachometer to measure RPM and an ammeter to measure current. The product of the first two, with some constant, yields the output power, while the current and applied voltage yield the input power. By using a fixed regulated voltage source and a good ammeter, efficiency and other data, necessary for graphs, can be calculated. Since stall current is very high and way beyond the continuous current rating, damaging heat develops rapidly. To reduce this, a stall torque drum was added with a fixed hook and string connected to a balance scale, for rapid readings.
NOTE: For those who may be satisfied with graphs on a par with those generally published by manufacturers, only the noload current and RPM plus the stall torque and current are required. From these abbreviated data, graphs may be plotted or calculations can be made, to evaluate and compare motors with reasonable accuracy. The only required instrumentation would be: a tachometer, a torque drum, spring balance scale, meters and a good power supply. The preliminary data posted was done with these.
The first dynamometer developed was the Prony Brake of the late 1700's. This used two blocks of wood clamped about the shaft with adjustment screws. These were affixed to a long lever arm, with its end connected to a balance scale to measure the force exerted. There were many variations over the years. But most of these arrangements require adjustments and apparatus, which are not practical for very small applications.
About 1858 Lord Kelvin developed the "rope" brake, based on the earlier design by Prony, by replacing the wooden friction blocks with a length of rope coiled around the revolving shaft. Variations of these are still used in many engineering school laboratory exercises. Designing a small, inexpensive unit, eliminating torque lever arms, presented problems.
Many years ago, Robert Higgins collected data on Sagami motors for NWSL, but the actual set-up or calibration was not found. After considering and trying many possibilities over the years, none proved totally practical. Thanks to some recent research on the Web and elsewhere, a simple inexpensive idea was developed.
First, motors vary in size and shape, but a Micro-Mark, or similar, vise with rubber jaw pads could clamp them for easy alignment. Since this vise places the shaft center at a height of about 7", a simple 8" "L" bracket could position the dynamometer vertically and horizontally by clamping it under the vise base. Second, Motor shafts vary in diameter and in many cases, the actual measurement is quite different from the nominal value. Modified NWSL universal joints can accommodate them and ease the alignment. The remaining problem is to make the dynamometer.
Since most new motor specs are rated in the metric system with TORQUE in gram (force)-centimeter (gmf-cm) and power in watts, this will be used. Fortunately 1 ounce-inch = 72.00775 gmf-cm ≈ 72 for easy conversion. Also 1 mousepower (.001 horsepower) = .746 watt. A set of slotted, gram weights measuring up to 610 was purchased to measure running torque along with two spring scales of 250 and 500 gm to measure stall torque.
A prime item required is a well regulated 12 V DC power supply that will handle at least 4 amps. Reasonable computer switching types can be found at Jameco, All-electronics and others. Most of these will provide 5 V DC at higher currents for lower voltage evaluation.
There are three distinct types of measurements required to fully graph a motor, all of which include current measurements. The first is the noload current and RPM, which for greater accuracy and to avoid loading, should done directly on the motor shaft without the dynamometer coupled. A small drill chuck, with a contrasting stripe painted across it, can accommodate different shaft sizes. For most practical purposes, the slight increase in current and decrease in RPM due to dynamometer load are minor.
The second is a single, short time length, test to determine stall torque and current. Since the current value is several times that of the maximum operating current, time must be kept at a minimum, with success measurements spaced to permit cooling. A string, affixed to and wrapped around a 1 cm radius drum, will pull against a spring balance and read directly in gmf-cm. With the addition of the noload current and RPM, abbreviated graphs can be plotted based on theory. Theoretically the maximum power is at one half the stall torque and maximum efficiency is somewhat less; but in practice they may vary. Frequently they are beyond the maximum continuous operating current rating. Although this abbreviated method is the most common type of data presented by manufacturers, it only yields a fairly close approximation.
Performing this test at low voltages can reveal data close to the motor's start-up torque. Assuming a locomotive has sufficient weight on the drivers to prevent slipping, this would indicate the starting tractive effort, when converted by the gear train and driver diameter calculations to force at the rails, using the methods described in GEAR FUNCTIONS . The drawbar pull in ounces can be found by dividing gmf by 28.35.
In the third running type, current and RPM are measured at known torque values based on the stall torque. Plotting the current and RPM data at each torque increment will produce a graph of the actual motor characteristics for comparison.
NOTE:With very small motors, the friction present in the dynamometer bearings may produce sizable errors in the noload current and RPM. This may effect the abbreviated graphing method, but complete running data, in the third full graph type, will compensate for this. These measurements should be taken on an unattached motor shaft with an optical tachometer.
Since both efficiency and power require drum RPM and working with a laser hand-held proved to be a pain, the next problem involved rigging a convenient tachometer. An inexpensive version ($33 US) used by RC fans measured in 100 RPM, which should be close enough. But it used ambient light reflected from propeller blades. When used under AC lamps, it only registered 3600 RPM for the 120 PPS of the US 60 Hz power. Not wanting to work in the dark, an alternative had to be found. The photo cell with extended leads and a 12 v bulb were mounted in a piece of 3/8" bar stock with a slit to clear a two holed disk mounted on the shaft.
After several unsatisfactory, CAD drawings with locally found metal components, a 40 mile trip to a commercial metal supplier turned up some very usable remnants at good prices. ie. Aluminum pieces at $2 per pound.
Since this is a first attempt, probably there will be need for improvement and refinement. Suggestions are welcome.
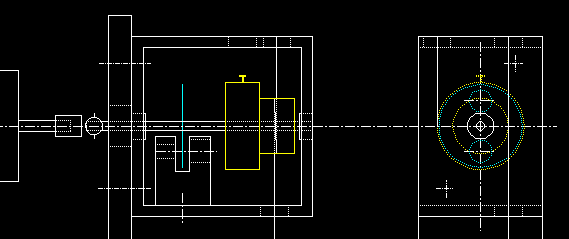
The image shows the first quasi successful assembly.

Note: Adjust brightness and contrast for optimum viewing.
DYNAMOMETER / VISE, MOTOR, SCALE & TACHOMETER.
Running weights on hanger hooked to box.
8" L bracket clamped under vice base, supporting dyna box at top.
Worm is still on shaft to right of motor.
U-joint is in front of scale support rod.
The latest drawings are below.

Note: Adjust brightness and contrast for optimum viewing.
FULL LAYOUT W/ VISE & MOTOR.
Vise and motor on left.
8" L bracket clamped under vice base, supporting dyna box at top.
The lower section is broken to show the height may vary with the vise chosen. The unit may be clamped at a bench corner to permit weight pan and scale to drop below bench top level.
Before jumping in with both feet, it would be wise to read through and digest the entire construction and use, in order to determine what is required for your specific needs. As built the device should handle up to large HO motors, like the Pittman DC-81. The methods and steps are not sacred, but these worked well. The materials are not critical, but reasonable rigidity is required for good string tracking on drums and to withstand scale spring and running weight forces.
The list below contains the minimum requirements, but may vary dependent on choices made as pointed out in the suggestions..
| MATERIALS | |
|---|---|
AMOUNT |
DESCRIPTION |
| 1 | 8" heavy duty "L" bracket. |
| 1 1/8" | 1 5/8" square aluminum tubing. |
| 12" | 1/4" round aluminum rod. |
| 5/8" | 7/8" round aluminum rod. |
| 5/8" | 1/2" square aluminum rod. |
| 2 | 1/4" ID machine screw eyebolts w/ nuts. |
| 1 | 1/4" ID "S" hook |
| 2 | NWSL 2 mm x 1/4" OD flanged bearings. |
| 2 5/8" | NWSL 2 mm shaft. |
| 1 pk | NWSL universal couplings. |
| .1" | K & S 7/16" OD tubing. |
| 1 | #0 x 1/4" self tapping screws. |
| 2 | 4-40 x 5/16" screws |
| 1 | 2-56 x 1/4" screw |
| 2 | 3/32" or 1/16" wheel collars w/ set screws. |
| 1 | Ohaus 250 gram scale. |
| 1 | Ohaus 500 gram scale. |
| 1 each | gram weight, 1, 5, 10, 50, 100 |
| 2 each | gram weight, 2, 20, 200 |
| 4" | Evergreen 1/4" tubing. |
| 1 | 1/4" ID x 1/2" OD styrene washer. |
| 2 | 1/2" OD styrene disks |
| 1 | small fishing swivel hook. |
| 1 | spool Coates nylon upholstery thread |
| 1 | model airplane tachometer. |
| 1 | short 12v grain of rice bulb. |
| 1 | 15 volt meter |
| 1 | multi ammeter |
| 1 | well regulated and filtered 12 VDC power supply (5 VDC optional) |
| 2 | 2 mm ID x 6 mm OD ball bearings (optional) |
NOTES:
Several tachometers are available at about $33 USD.
Surplus computer power supplies are available from Jameco, All-electronics etc. For evaluation at other voltages, an adjustable, good quality powerpack might be used with a voltmeter. Some packs are well regulated in the momentum mode.
Weights and spring balance scales are available from Cynmar. Type choices depend on need.
Since they calibrate the torque, the drum diameters are the only critical dimensions. The remaining dimensions can be adjusted for fit.
Mount the bracket with the vertical close to the vise jaw and mark the shaft height at the center of the jaws. Drill a 3/8" clearance hole at this height near the vertical centerline. The two holes for the scale support rod eyebolts should be located at a distance from the rear edge equal to about the diagonal length across the nut points. The top one should be about the same distance down from the bracket top. The bottom one should be about 1 or 2" above the inside "L" corner. Hole size should just clear screw. Screw should be cut off just beyond nuts after mounting. This should provide shaft coupling screw and weights clearance.
The box is a nominal 1 5/8" square aluminum tube for rigidity and access to front and back. This is cut to the width of the bracket, or about 1 1/8". NWSL 2 mm shaft was chosen for use with their 2 mm x .125" OD flanged bearings to reduce friction. These actually measured .1225 OD. Mark the centers on two opposite tube faces and drill with #31 bit. The holes may require slight reaming for a snug fit. Mount only one bearing to test for snug fit. The other will be added later, after shaft insertion.

Note: Adjust brightness and contrast for optimum viewing.
BOX DETAILS PLAIN BRARING.
Drum is yellow.
Tachometer disk is blue.
String locations are solid line in end view.
The right string makes one or two turns around drum for running measurements, while the left is hooked on the pin only for stall torque measurement and must be removed during running tests. Note direction of rotation.
Place the flangeless box face in position on bracket and line up holes and edges. Clamp securely and drill two #4 tap holes about 1/4" in from box edges on diagonal corners. This should leave clearance for scale support rod at rear of bracket. Separate pieces, tap box holes 4-40 and drill bracket holes for clearance. Test fit with screws about 5/16" long. The box will be prepared off the bracket.
If using the 6mm OD ball bearings, drill axle holes with 15/64" bit and ream until a snug fit is obtained. The shaft can be inserted first and the bearing can be pressed on shaft and into box holes with light hammer tapping to align.
Note: Adjust brightness and contrast for optimum viewing.
BOX DETAILS BALL BEARING.
Drum is yellow.
Tachometer disk is blue.
String locations are solid line in end view.
The right string makes one or two turns around drum for running measurements, while the left is hooked on the pin only for stall torque measurement and must be removed during running tests. Note direction of rotation.
The spring balance used in torque measurement is mounted above the box to eliminate including its weight in measurements. A thread is strung from its hook through a hole in the box and hooked over a screw on the stall torque drum. The shaft is rotated counterclockwise (downward in the front), coiling the thread around drum thus pulling against the balance spring. On the box top, toward the front edge, drill a 1/4" hole, about .59 from the flanged edge and 1cm from the centerline for the stall string.
The location of holes required for the running portion string will be influenced by the running drum diameter. The accepted method to measure torque is to mount the spring balance above and attach the running string to it and feed it through a hole to the drum. The string is wrapped around the drum and fed through a bottom hole to permit weights to be hung from it. The shaft is rotated to lift the weight hanging below. The actual applied force is found by subtracting the balance reading from the hanging weight.
To avoid switching motor polarity, the running torque string will be toward the rear. Drill another 1/4" hole at the running drum radius from the centerline and about .xxx from the outer end.
On the bottom face, two holes are required. On the centerline, about .46" in from the flangeless edge drill a #2 clearance hole for the tach sensor block screw. Toward the rear edge, drill a hole, at least 1/4" OD, .39" from the flanged edge and 1 cm from the centerline for the running string. Another hole may be added near the bracket face rear to route the sensor leads down the bracket and to secure the leads to eliminate drum contact..
The next part depends on how fancy you want to get. Small hooks may be found or made to fasten strings to the top. The second, for the stall string, can be anywhere near the edge to conveniently hold the string away from drum during running tests. Loops may be tied on string ends or small rings may be fastened.
The stall torque drum is carefully turned to 2 cm OD from 7/8" round stock, cut to about 5/8" long and bored # 47 for a snug fit on the 2 mm shaft. Aluminium was used to reduce weight and flywheel wobble effects. Using a vee-block, drill a #0 tap hole on the rim centerline. Insert a #0 self tapping screw leaving enough clearance under the head to attach string loop or ring. The face toward the tachometer was blackened.
During the first trials, the running drum presented some problems in sizing and calibration. With the chosen 1 cm radius, static friction lifted light weights, jamming the hook at the box hole leaving the scale string slack. This stalled small motors. After some running the drum was polished by the string, improving the situation, however the soft aluminum developed minute grooves which could be felt by sideways finger pressure. A 1/8" radius steel drum proved to be much better after polishing with string..
The object here is to eliminate ambient light. Prepare a sensor holder block from 3/8" square bar stock cut about 5/8" long. Mark the center on one end and tap drill for #2-56 screw. Slot the other end about 1/8 wide and about .4375" deep to clear tach disk. About .4" from the screw end on the centerline, on one side, drill a hole to fit the tachometer sensor and on the other drill for a 12 V bulb. The surfaces should be blackened to eliminate reflection. Do not mount permanently.
The sensor and bulb may Be inserted with a little touch of Goo to secure them.
Using 1/2" round aluminum bar, bore # 47 for a short distance and part off to create a .1" thick disk. Stop parting short, leaving a small shoulder to help stabilize and align the resulting disk. Since the tachometer expects two flashes per revolution from a propeller, two # 7" holes are drilled on opposite sides at .3125 from the center. The disk could be cut from .1 styrene sheet. This should be blackened also.
The disk and drum are mounted on a 2 mm shaft, cut about 2.3" long. Mounting the assembly is a little tricky, since the shaft will not pass through the un-flanged hole, if the mounted parts are in their final positions.
NOTE: Since torques may be high, shaft should be knurled under the drum. This can be done with straight serrated Vice-grips. The NWSL horn-ball also slipped. The shaft end should be knurled after insertion in bearing .
From the shaft end without knurling, press the drum past the center. Try the insertion to clear both drum and shaft end. The drum may be pressed to the point where it and the end just pass. Next press the disk with shoulder first, if one exists. Leave sufficient space between the two for later pressing.
Push the disk end of the shaft through the flangeless hole in the box until the opposite end clears. Insert the other end into the mounted bearing and place the other bearing on the shaft. Press it into the box hole. Check rotation.
The disk is then centered about 1.42" from the drum end of the shaft. To assure that it is perpendicular to the shaft, push shaft through bearing until disk face is against box wall. Apply a small fillet of cement at joint. When set apply another to the opposite side. Press the drum, to about .42 from the same end. Some Loc-tite may be used, if not tight.
Next mount the sensor holder by sliding it under the disk and screwing it to the bottom, after alignment. Be sure to feed wires down through hole and assure none touches rotating parts.
Borrowing from the RC fans, wheel collars with set screws will be used to center disk in slot. A 3/32 collar will fit loosely, but can be tightened down. Or if you are fastidious, you might bore a 1/16" collar to clear 2 mm. Place bronze thrust washers on each end and add collars. Center disk rotation and fasten one collar. Push other collar in to reduce play and lock. Check rotation and disk clearance by spinning. Chuck the shaft in a rotary tool and run-in for a few minutes. Apply La-bell 101 and repeat.
Ball bearing mounts will not require wheel collars or thrust washers. Apply Loc-tite sparingly at shaft and box to bearing joints.
Finally press NWSL horn-ball on disk end of shaft. Except for strings, box is ready to mount on bracket for testing.
There are several niceties that may be added for convenience. Two push buttons may be mounted on bracket and wired in parallel in one test lead. One would be on-off for running and other momentary for stall testing. A socket may be mounted in the tachometer sensor holder to permit unplugging for storage.
This can be done by using a 1/4" aluminum rod fastened to the bracket upright, near the rear edge, with either eyebolts or electrical conduit clamps. The upper rod end is bent to form an L, extending at least 1 1/2". Length will be determined by scale selection. Hang the scale with the "S" hook and pull the bottom hook down to the full scale deflection. Measure the distance between top and bottom hanging points. Measure from bracket horizontal top to box top. Add the three values together and cut an inch or two longer to be sure. Slowly bend the top, to at least the 1 1/2", in a vise checking for a good right angle. Fasten the eyebolts, insert rod and hang scale from the "S" hook. If the pivot is loose, turn upper eyebolt slightly an tighten securely. If the hook slides on the rod, tighten loop with pliers. Tie a short length of thread to bottom hook, feed through box hole and pull down slightly. Scale face will angle to the left. Twist "S" hook in vice until face is forward.
After trying rings and hooks, I settled for a loop of thread to fasten to the drum screw. Unless you have needle fingers, tweezers help here. Tie a small bowline in one end, feed through hole from top and hook on screw. Throw a few turns over the hook and pull tight. Cut thread a few inches longer. Tighten again and tie an anchor hitch on the hook. Trim excess. After a few learning tries, it is easy to slip loop over screw by turning the drum to slip screw into it.
The NWSL cups come with several bores to accommodate different shafts, but they slip at torques above about 180 gmf-cm. To rectify this, #0 tap holes are drilled into one side of the 2 mm size. A # 0 self tapping screw is tapped in to tighten. The thinner wall of the 3/32" / 2.4 mm size tended to strip. The cups were coated with CA and forced into .1" of 7/32" K & S tubing and a new hole was drilled . This works well. Grab a motor and your ready to measure stall torque and check the tachometer after electrical connections. Impatient, I used test clips, before the control panel was completed.
For the running weights, the slotted style were chosen to avoid balancing a pan. The hanger offered weighed 50 gm, which is beyond the stall torque on some motors, so a lighter one had to be made. Since the center hole were 1/2", weighing a piece of brass tubing, proved it too heavy. A piece of Evergreen was cut slightly long to hold all the weights. Some fit very tightly, but the edges were sharp enough to plane down the tubing for a slightly loose fit. Next a plastic washer was reamed to a force fit and cemented on one end. After setting, it held all 610 gm of weight. The next problem was hanging it. A #7 fishing snap swivel had a hook and a ball that fit loosely inside tube to help stabilize the top. There was just enough room above the tube to slide a 200 gm weight on or off. The total weight was just under 3 gm. Two smaller disks with holes large enough to feed the thread through were weighed in to even the weight at 3 gm. By feeding a thread through and out the tube top it was tied to the swivel, pulled down and knotted at the bottom. It worked well but the knot made the holder unstable when stood on the bench. The lower disk was drilled through to clear the knot. After cementing them together, they were centered and cemented on the bottom and the assembly was re-threaded . The ball should just enter the tube with full load, leaving sufficient space at top to pass the 200 gm weights.
A bowline was tied in another thread, wrapped around the drum and passed through the hole in the box bottom. The hanger with some weights was hooked on and the thread was pulled upward to check clearance below. Then the thread was clamped to the upper box for testing. Rotating with a pull on the upper string stalled the motor at a very low torque. Reversing rotation with a lifting pull yielded much better results. The upper thread was found to be slack.
A small hook can be mounted in the box top to support the upper string. It will serve also to hold it out of the way during stall testing.
Calibration can be verified with a motor, whose stall torque has been measured. The hanging weight should be the same as the stall torque. Using fine Flexi-grit strips, the drum diameter can be deduced and polished to correct calibration.
Caution: These tests must be of very short duration and sufficient cooling time between repeats, since the current draw is very high at this point. Reduction and polishing should be done with a rotary tool coupled to shaft. Chuck a short length of shaft with a u-joint cup and clamp tool in vise.
Not a necessity , but convenient. Since slope front project boxes seem to be obsolete an old wooden, train control panel was resurrected to hold meters, connectors, switches and tachometer body. It is just a sheet of thin plywood screwed to two triangles of shelving.
The meters are RadioShack , if you can find them. In our area they put 5 electronics parts dealers out of business and then gradually disappeared their part selection. Jameco offers similar meters at a reasonable price. The ammeter should have multiple ranges determined by your requirements. See METERS for modification methods. Selected ranges were .1, .5, 1 and 5 amps.
The layout is your choice, but the meters and tach readout should be readily visible during testing. The tachometer was mounted to the face with Velcro to permit easy removal for battery change.
Wiring, connectors and switches are again your choice. 4P4C modular plugs and jacks were used for the tachometer leads to pass through the box hole near the sensor post. Since a 1P4T 5 amp rotary switch for the ammeter was not readily found, an alternate scheme was developed. Flexible test lead wires, with small alligator clips and polarity marking, were used for motor connections.
CAUTION:Do not fasten test lead clips directly to brushes or springs. The weight of the clips and leads can move them from their normal positions and possibly change the contact pressure on the commutator, yielding erroneous results.

Note: Adjust brightness and contrast for optimum viewing.
EXAMPLE WIRING DIAGRAM.
I is the grain of rice bulb. The voltmeter is placed across the output to eliminate voltage drop across meter and switches. STL is a NO pushbutton. RUN is SPST. S1 and S2 are SPDT center off. S1 should be in the up or 5 A position during storage and at start of each test to protect meter movement. Lower ranges are selected downward as needed. One switch should always be in the off position.
USE
This section will be completed when more experience is gained.
Usage is divided into several distinct parts, selection of which will be determined by desired data.
Measured with a tachometer and ammeter, these values will be required as one anchor point for all evaluations. In themselves, they represent only the roughest comparison of motors, but do not indicate any potential of the operational characteristics under load.
The motor may be mounted on the dynamometer without any braking on the drums and run for a few minutes to distribute lubrication, followed by readings. However the friction of the bearings will reduce RPM and increase current This may be noticeable in very small motors, but should not effect overall evaluation, since the friction is present for all tests. To reduce this, ball bearings are recommended.
A simple check may be made using a small black drill chuck, with two silver stripes painted diametrically opposite on the drum. The chuck can grasp any sized shaft. The assembly may be held in the vise to take readings.
For the simplified graph method, this is the second anchor point for the loadline from which good approximations of motor parameters can be calculated.
CAUTION!!! Since the armature is not moving at the stall condition, no counter voltage is developed. The stall current is the result of the full applied voltage limited only by the winding resistance. This value may be several times the maximum current rating of the motor. Only intermittent short term applications should be used with sufficient cooling time between.
The ammeter should be positioned adjacent to the balance scale for quick reading. Couple the motor to the dynamometer. Check that everything turns freely. Place the loop of the stall string against the drum and rotate the drum until the screw catches the loop Apply a light tension to the string to hold it in position. Press the button and hold only long enough to obtain readings. Record values while allowing cooling Take several sets to ascertain true maximums.
NOTE: The motor should always rotate counter-clockwise, when viewed from the right end to keep a constant tension on the upper part of the running string and to avoid fouling it when not in use.
BACK TO MOTOR EVALUATION
BACK TO REMOTORING
BACK TO SUPER MOTOR
