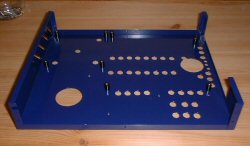
Base
With Spacers |
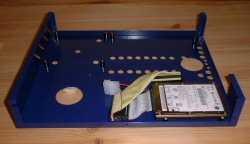
To mount the main components, Hard Disk,
Motherboard, FM Transmitter and Optical Drive I used 10mm plastic
spacers with M3 bolts to raise the various items off the base. This
allows for better air circulation and gives a solid foundation for
the components. |
Hard
Disk Goes In |
The 2&1/2" laptop
hard disk has four M3 threads on the underneath. Using some nylon
cheesehead bolts, I cut the head off and made the thread length long
enough to go into the spacer and into the disk's thread. I then
screwed the thread into the hard disk, then screwed the spacer onto
the exposed thread. This allowed me to then put the disk on the base
and put some bolts through the underside of the base into the spacer
to hold the disk down nice and firmly. I then folded the IDE cable
and aligned it with where the IDE connection is. |

Mounting |
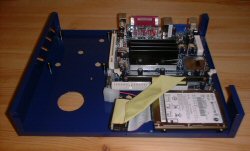
Motherboard Fitted |
The Mainboard is placed on it's spacers and
screwed down. I replaced the factory North/Southbridge heat sink
with a bigger aluminium one I had cut from the remnants of the main
heat sink. It has a hole drilled to allow for that capacitor
inbetween the chips and is secured by some Arctic Silver Epoxi
(strong stuff). | |


 Base Component
Installation
Base Component
Installation
 Previous Stage
 mr_pdt@yahoo.co.uk