
|
||||
|
||||
|
||||
|
||||
|
||||
|
||||
|
||||
|

 |
|
 |
|
 |
|
 |
|
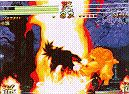
Genjuro's Triple Death Hack
 Genjuro's Cherry Blossom projectile combo
They include:
- Nakoruru: (Slash)
+ slash (Use immediately with the projectile.)
- Galford:
+ button.
- Hanzo:
- Ukyo:
+ A (If he block down)
- Genjuro: (Slash)
- Gaira: (Slash)
+ B / C (Depending on where he is blocking); (Bust)
+ slash.
- Basara: (Slash)
- Tam Tam: (Bust)
- Jubei: (Bust)
It is also possible to do a guard crush on him to break the projectile, or use the BC attack if he block low.
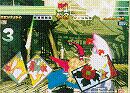
 Sogetsu's Moon Glow trap
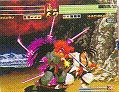
 Amakusa's Hornet Gouger teleport
 Galford / Hanzo's Shadow Copy move
 Galford / Hanzo's Replica Attack
 Charlotte's jumping C slash
 Tam Tam's weapon slashes
Kazuki Bust Super combo
Genjuro Slash 5 Hit Combo
 + B), add another slash (can be either of the three buttons), another move, one more slash and then end it off with the last move.
When your friends know enough about this move already to block / anticipate it, try this for a difference, and with this trick it is difficult to block against the move even if they know of it.
Haohmaru's Multiple Move Combo
Haohmaru's Extreme Special Combo
CD AABBCCABCCC +

