
Instructions:
A: The basic construction with builders foam (Bufoam) Pictures No. 1 to 20
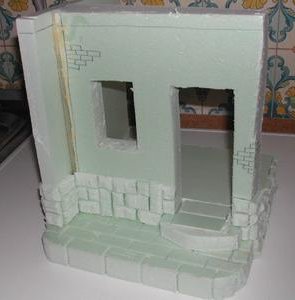
a. Cut 3 pieces out of your bufoam with a big
cutting knife
26 x 26 cm (Base)
21 x 25 cm (left wall)
23 x 25 cm (front wall)
Link for transforming cm into inches:
(http://www.manuelsweb.com/in_cm.htm)
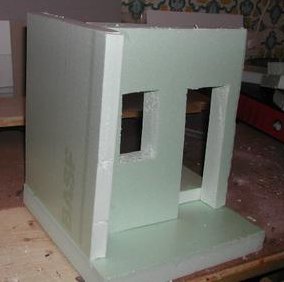
| Put the two walls
onto the base loosely and decide, how much room you want for the outside scene and how
much for the inner room. Mark with a pencil where you want your front wall. Pic 1,2
|
|
 Pic 1 |
|
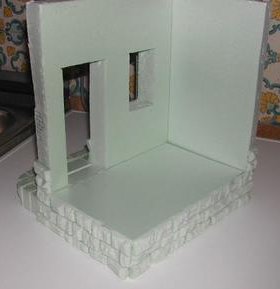
| Measure your inside room and cut
another piece of bufoam in this size. Now you need half of this piece in THICKNESS. If you
are not able to cut the whole piece at once, you can do it in 3 sections and put those
together, it will be covered with the floor anyway and you will not see the cuts. Pic 3 |
|
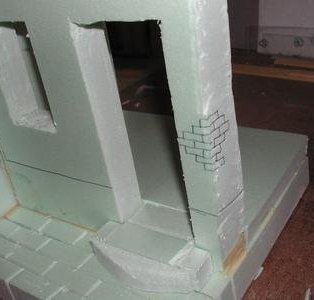
| b. Put your front wall in front
of you and draw the door and the window onto it Door: 18x 7 cm Window: 9x 5 cm Space between left wall and window: 4 cm
|
|
| c. Cut the front
steps to fit into the door space and cut one fitting piece with a rounded edge. (Thickness
is the same than your inside floor = 1,5 cm) Pic 5
|
|
| d. Cut "
stones" onto the floor of your outside space with a small cutter. Cut like you want
to form a " V " and the small strips come out easily. Pic 6
Pic 6
|
|
| e. Mark the heights
of your stone covering on your walls Pic 7
|
|
f. Mark the places where you want your brick spots Pic 8, 9
|
|
 Pic 8
|
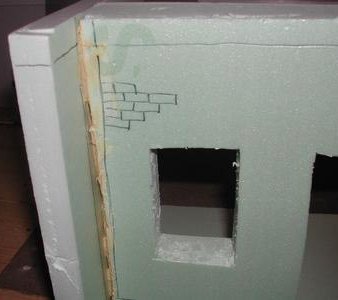 Pic 9
|
| g. Mark where you want your
timber work. (This does not need to be done exactly, you can always change your mind
later) Pic 10 |
|
h.
Next cut a block of the heights of your marked stonework Pic 11. Cut slices off of this
block. Vary the thickness from about 2 to 5 mm (Millimeters,1 cm has 10 mm ) Pic 12 |
|
 Pic 11 Pic 11
|
|
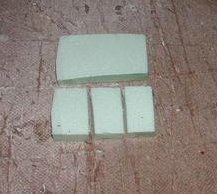
| i. Cut those slices into 3
sections. You need not to measure, we want a little unevenness. Cut about 15 of those
stones Pic 13
|
j. Now
take 15 more of your slices and cut them the way shown in Pic 14. Cut freehand, don’t
measure
|
| k. Now take another
15 slices, cut them as in Pic 13 and cut those in half Pic 15. You have 3 different shapes
of stones now, which all fit together.
|
|
| l. Try to lay an
example for a wall pattern on the table Pic 16
|
|
m. Carve each and every stone now. Cut off the edges like you peel a potato. Cut the surface in different ways, push holes into them and scrap them with the blade of your knife, treat them really bad and don’t be careful, we want them to look like real rocks. Pic 17
|
|
| n. Take your hot
glue gun and glue the stones onto your walls all around in a pattern of your choice Pic
18,19,20
|
|
|
|
Onto more of the Instructions ![]()
{Workshop Page 2} {Page 3}{Page 4} {Page 5} {Page 6} {Page 7} {Page 8}


 Pic
12
Pic
12