

Instructions:
G: Painting the stones, finishing touch, landscaping
| 1. Painting the stones: (Acrylics) a. Paint the stones on the walls with the light grey again and go deep into the gaps, so no bufoam is showing through any more. Don’t let it dry, before you continue, we want to blend those two colours! |
| b. Mix a warm beige with 3 parts of white, 1 part of Honey Yellow and one
drop of Umber green. |
| c. Paint parts of the stones with the beige mixture and blend with the grey. Do mainly the surfaces, not the gaps because the highest part of a stone is the lightest in the sunshine. Pic 85 |  Pic 85 |
| d. Do this all around, add some more light grey to the floor stones. Paint the doorsteps with the " Granite" paint and add a little of the Granite paint to the floor also. Pic 86 | 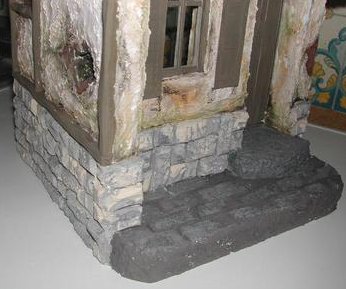 Pic 86 |
| e. Now take out your artist watercolours and a very soft
small brush and paint some of the stones all around the scene with a little of the reddish
brown, light Ochre and Olive green. Always blend the colours. Don’t " draw"
and don’t be careful! Work virtuously, " flying " over the stones with your
brush. Let it dry. Take the Paynesgrey and add a wash of it to some of the stones. Pic 87,
88
Pic 87 |
Pic 88 |
| 2: Finishing touch Now I tell
you my " secret " of making wood look old, it is so simple! |
|
| c. Rub it SOFTLY without pressure onto ALL wooden parts of the scene, everything made out of cardboard, the doorsteps, the bricks and the floor outside. Pic 89 |  Pic 89 |
| d. Do the same in the inside of the scene. Pic 90 |
Pic 90 |
| e. Do the same onto the left outside wall of the scene. Pic 91 |  Pic 91 |
| 3: Landscaping |
|
| a. Take the landscaping material and decorate the
outside to your desire. Pic 92, 93,94 |
|
 Pic 92 |
 Pic 93 |
Pic 94 |
|
| b. add some of the reddish brown and Umber green to the shingles of the little roof and add some moss to it. Pic 95 | 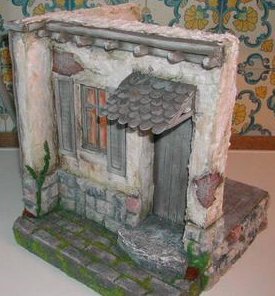 Pic 95 |
{Workshop - Page 1}
{Page 2} {Page 3}{Page
4} {Page 5} {Page 6} {Page
8}
{Home}
{Workshops}
{Links}


