Tools:
- Jig saw w/ wood and metal blade
- Drill w/ hole saw
- 3M metal sand paper
- Safty goggles (important)
- Ear muffs
- Compass
- optional : mother to bring cold drinks
Materials:
- 18x24 inch plexi glass (or lexan)
- Window molding strip
- screws, nuts, washers
- 92mm fan w/ grill
- Masking tape
Window and Blow Hole: Part 1
Started 8/2/200
Show me the way: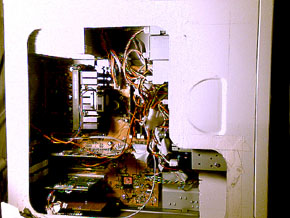 There it is. If you ask me, this isnt bad at all, considering this was my first experience with a jig saw. As you can see, the cuts were nice and straight with nice rounded corners. I first mapped out the
area i wanted to cut the window and drew that in with pencil. Then for the rounded edges, i used a compass set for a 3 cm radius for all the corners, just to give the window a nice round feeling and not a sharp feeling.
There it is. If you ask me, this isnt bad at all, considering this was my first experience with a jig saw. As you can see, the cuts were nice and straight with nice rounded corners. I first mapped out the
area i wanted to cut the window and drew that in with pencil. Then for the rounded edges, i used a compass set for a 3 cm radius for all the corners, just to give the window a nice round feeling and not a sharp feeling.
To start the cut for the window, you would normally have to make a pilot hole with a drill or something, but i didnt have too because this particular case had vents on the side that i used to start my cut. To do the cut, i used a metal jig saw blade that had smaller teeths than it normally would for wood and just followed my pre drawn plans. Be sure to put your safty goggles on cause those metal shavings hurt if it gets you in the eye. And put some ear muffs on, god damn it, i didnt have any and i was deaf for like a whole day.
Take your time. Because if you mess up, there are no erasers. If you look closely at my case, you'll see
that i have masking tape along the edges of the window cut. That was to protect the paint from being scrached off due to the friction between the case and jigsaw. After succefully cutting the window, all you
have to do now is sand the rough edges a little. I had no idea there were sandpaper made specifically for metal till i went to the hardware store and saw a wall full of then. What will they come up with next?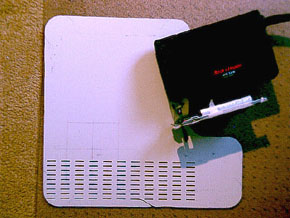
Here is the peice of the case that i cut out. You can still see the marks that i made for the fan blow hole that i'm planning and the circles that i drew for the corners. That there is the Black 'n' Decker jig saw i used. Old peice of tool, but whatever gets the job done works for me.
Tell me more: Page 2 >
Related Links |