Tips and TricksThese are pretty much for beginners, but many tatters might find them useful. Some of these are from my tools page, but are still pretty good tips, I think, so they go here, just in case you missed them. Hitch onto the shuttle! Instead of tying the thread onto the shuttle post or bobbin, I do a little hitch knot. It is quicker, and when the shuttle is emptied, you can just undo it instead of cutting it off (Ugh, where'd I leave my scissors?) 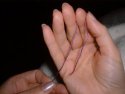


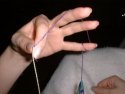
 Click to see the whole process... Counting Stitches I'm not talking about counting stitches on a finished piece, I mean counting while you are tatting! When I was first learning to tat, and I would forget whether I had just done the first half or the second half of the double stitch. Instead of counting each double stitch, I would count each half of the double stitch like so- I start a ring or chain, the first stitch counts as one and anchors the ring or chain. Then, for all the rest of the stitches I start counting: One-and-a-half, two. Two-and-a-half, three. And so on for each double stitch. After a picot, when I do a double stitch to hold it in place, it is so automatic that I don't count it. That of course counts as one double stitch. Then I immediately start again with: One-and-a-half, two. Two-and-a-half, three. And so-on. Don't laugh, - it seems simple enough, but the technique I had before was oooooooooone---, twooooooooooo---, stretching it for as long as it took to do the stitch, and I was always losing count! When I started this counting technique, I never had another problem. This simple little thing has also helped me to speed up my tatting. Undoing a stitch To undo a stitch on a chain or an open ring, poke a hook or spike into the "bar" of the double stitch, and pull up. Send the shuttle back through. Then, look on the backside of the work, and there's that "bar" again. repeat like for the previous half stitch. Getting Ready for a Chain Always remember to take in the extra thread on the working shuttle before setting up for a chain. Since oftentimes you've just finished a ring, there is much too much thread let out of the shuttle to tat a chain comfortably. It is a bit cumbersome to re-wind the shuttle when you already have your other hand all set up for a chain! The perfect Pinky wrap for a chainWhen I first learned chains, I learned to wrap the thread from the pinch, over all fingers and anchor onto the pinky by wrapping several times. Invariably you will have to unload the pinky to get more room to tat the chain. But if you wrap this way, you will just have to "flick" your pinky to get a bit more thread to unload, and you can also just pull the "ring" thread to load more thread from the ball. It is kind of like a pulley system! If your scratching your head, because you already wrap the thread this way, then you figured it out quicker than I. I have never seen this in any of the books that I learned tatting from! 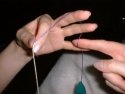
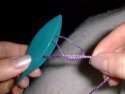
 Click to see the whole process... Click to see the whole process...Storage 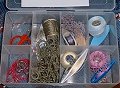
There are so many things you can use for storage, zip lock baggies, plastic craft boxes meant for beads or embroidery floss, even a fishing tackle box. See my tools page for pictures of my ideas! Post-it note your Patterns Jot your current pattern down on a Post-it note and stick it to your travel-tatbox. Usually tatting is quite repetitive, so you only need to write a line or two, especially if you have tatted a repeat of the pattern already! Tip- Don't use your tatting as a pattern until you have done the repeat twice, that way you can see where the joins occur. Make your own tatting hook Take your favorite size crochet hook, and drill a hole through the flat part. Then file off the extra handle length, making sure to file it smooth. Now you can sting it onto a necklace or ring for use with a hookless shuttle! Use a spool for yor thread  Get a little wooden spool from the craft store. They cost fourteen cents, and are great
for winding the ball thread onto, to make your tatting more portable- especially if you use a larger size thread. I like them better than
cardboard floss bobbins, because they are sturdier and give more weight resistance when doing chains. Get a little wooden spool from the craft store. They cost fourteen cents, and are great
for winding the ball thread onto, to make your tatting more portable- especially if you use a larger size thread. I like them better than
cardboard floss bobbins, because they are sturdier and give more weight resistance when doing chains.
|