
Tamarack House Construction Project
You can view the progress of our house construction by clicking on the Photos below. This page is organized chronologically from the end of the project (at the top of this page), to the beginning of the project (at the bottom of the page).
NEWEST: Photos A Last Look Around
01/29/01 Photos Finishing touches
01/23/01 Photos Winding down the work
01/10/01 Photos Trim and counter
01/05/01 Photos Doors and steps
12/29/00 Photos Handyman to the horizon
12/21/00 Photos Fixtures and cabinets
12/15/00 Photos Tile, electric, doors
12/07/00 Photos Wood and tile flooring
12/04/00 Photos Paint, heat, air conditioning
11/29/00 Photos Decking the porch and finishing the walls
11/18/00 Photos Fire, water and mud
11/11/00 Photos Sheet rockin and rollin
11/06/00 Photo House paint finished
11/05/00 Photos Insulation and electric cutover
10/30/00 Photos Driveway, low voltage wiring, more inspections
10/25/00 Photos Major inspections, electrical, electrical, electrical
10/16/00 Photos Landscaping, paint, plumbing and elec continue
10/7/00 Status The project moves ahead with lots of help from sub-contractors
10/1/00 Photos Siding complete, A/C started, electrical continues
9/23/00 Photos Siding progress
9/20/00 Photos Mechanical systems progress
9/16/00b Photos Garage roof sheathing, house siding continues
9/16/00 Photos Garage 2nd floor wall and roof framing
9/7/00 Photos Siding, trim and soffits are started. Electrical too.
8/29/00 Photos Porch framing finish and culvert install
8/19/00 Photos Porch roof framing and interior main staircase
8/12/00 Photos Porch floor framing and prototype window trim
8/8/00 Photos Caissons are rolling along
8/5/00 Photos Roofing mostly done - Utility tie-in - starting doors
7/26/00 Photos Roofing and windows
7/22/00 Photos House wrap and windows
7/15/00 Photos Sheathing, felt, and a cricket
7/8/00 Photos Prep for roof sheathing.
7/2/00 Photos It's a Turret, not a Steeple!
6/27/00 Photos Roof odds and ends.
6/25/00 Photos Setting the roof trusses.
6/23/00 Photos Preparing for the roof.
6/18/00 Photos Second floor sheathing.
6/11/00 Photos Cheap help - second floor interior walls.
6/04/00 Photos Three friends and a nailgun.
6/1/00 Photos Finishing the second floor decking.
5/29/00 Photos Second floor decking and a cantilever.
5/25/00 Photos Flush framing - floor joists continue.
5/22/00 Photos Got gas? Second floor joists begin.
5/20/00 Photos Slow week with wildlife.
5/12/00 Photos First floor wall sheathing. 1st floor exterior wall framing complete.
5/09/00 Photos Square and plumb walls. Tool of the week.
5/08/00 Photos Rain day - working inside. Guess the tool answered.
5/5/00 Photos The vacation is over. Starting the first floor walls.
4/23/00 Photos Garage upstairs floor is complete. It feels like we have an inside now!
4/20/00 Photos Temporary electric hookup finally happens! Finishing the garage walls (first floor).
4/17/00 Photos True the walls in 3 dimensions. Guess the tool.
4/15/00 Photos Started the garage.
4/12/00 Photos Finished the first floor deck. Tool of the week.
4/11/00 Photos Started first floor decking.
4/08/00 Photos Back to the fun stuff - carpentry. We complete the floor joists.
4/07/00 Photos A temporary electrical setup is assembled for the duration of the house construction. We pour the garage slab.
4/04/00 Photos Back to work after a short vacation. The excavator returns to fill in what remains of the hole for the house and to begin grading the lot and garage floor. The garage floor is readied for concrete.
3/28/00 Photos Working on floor joists, rim board and foundation wall insulation.
3/26/00 Very windy day. We made limited progress starting a few of the first floor joists and rim board.
3/25/00 Photos The foundation walls are complete and we set the steel girders that support the first floor. The walls are damp proofed. Sill sealer and sill plates are installed.
3/22/00 Photos After another snow day, we pour the walls. The concrete hardens slowly at 40 degrees, but in the long run (after 3 months), it will be harder than concrete that is poured on a hot day. We just need to make sure the concrete does not freeze during the first few nights.
3/20/00 Photos Forming the foundation walls. Concrete is strong in compression, but weak in tension. The horizontal and vertical steel rebar embedded in the concrete gives the wall strength against lateral forces.
3/17/00 Photos Forming and pouring the foundation footer. The entire house sits on this 16" wide and 8" high strip of concrete.
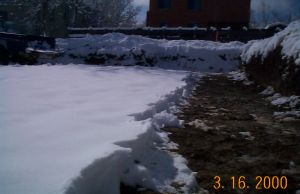
3/16/00 Photo Snow day. Had to shovel out the entire excavation and truck the snow out.
3/13/00 Photos Finished the excavation. Planning steel, garage framing materials, temporary power, and concrete foundation. Located sewer and water stubs using sewer TV records - they run a TV camera on a wire through the sewer line to view where the house pipes "Tee" into the main (way cool, but smelly). Ordering roof trusses for May.
3/10/00 Photos The city issued a building permit and we have started the excavation. Windows and doors ordered for late May.
3/7/00 Photos The lot was surveyed to locate exactly where to put the corners of the building and to establish how far down the excavator needs to dig the hole for the foundation. The excavator is scheduled for 3/10. Hopefully we get our permit tomorrow!
2/25/00 The plans are submitted and the city is reviewing them. They are going to respond on 3/8/00 with a building permit (we hope) or a requirement for changes. Status from the city indicates there are no major problems with the plans.
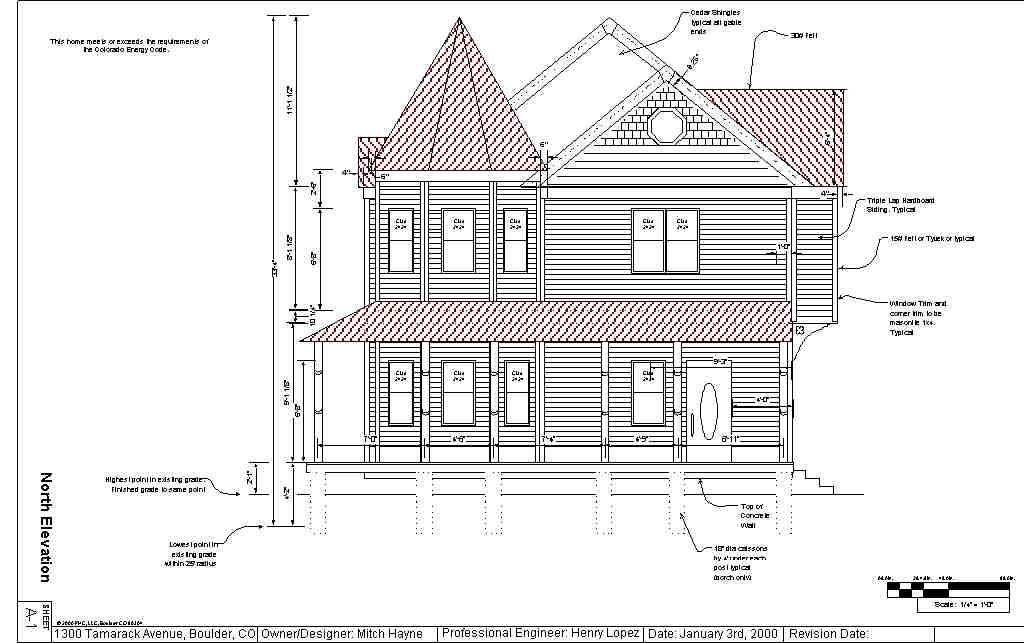
1/12/00 North elevation (Plans) Plans have been submitted to City - here's one page of the plans showing what we picture the front of the house will look like.
1/3/00 Photo Working on finishing the house plans. Here's what the vacant lot looks like.