HPS Charge Example
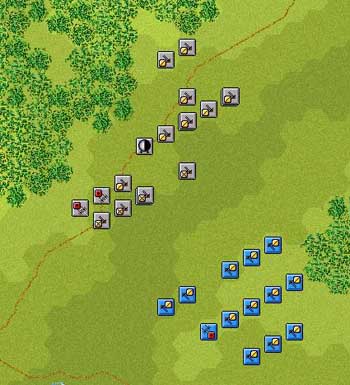
A line of French and Austrians are facing each other.
We will use Montbrun's cavalry division for this example
against an Austrian light brigade composed of two battalians
of Grenzers and two artillery batteries. The game engine
does not allow for counter-charges so the French cavalry will
come on unmolested - well you will see if there isn't some-
thing to be said for that from the guns and infantry!
The French choose a stack of Light Cavalry squadrons and change them
to Charge Mode.
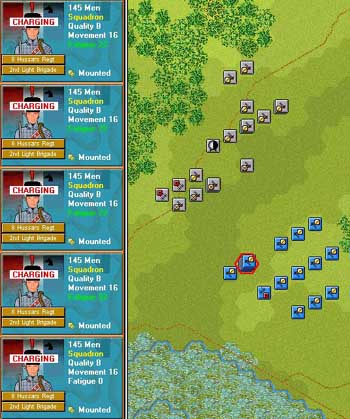
Likewise another stack is chosen. This time one of the squadrons fails the
Charge attempt and is Disordered.
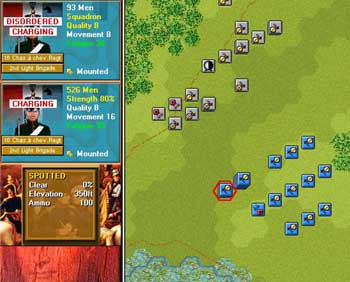
As they attempt to go into charge mode they are fired upon by a 6lb Austrian
battery.
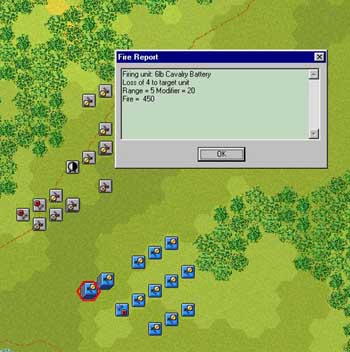
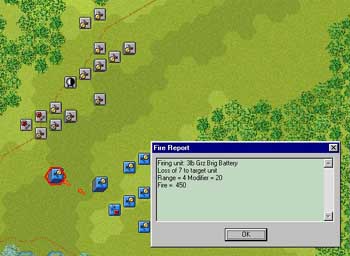
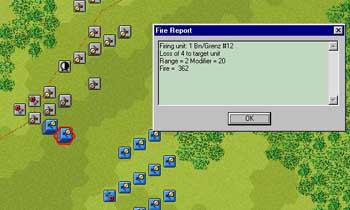
The charge is now underway. A 3lb Grenz battery fires on the cavalry. They hit for seven
troopers. The cavalry do not disorder and on they come.
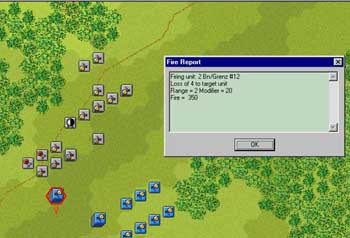
They move another hundred metres and are hit again by Grenzer infantry for four more troopers
lost. Still in good order.
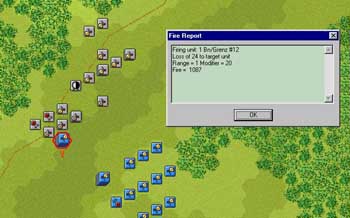
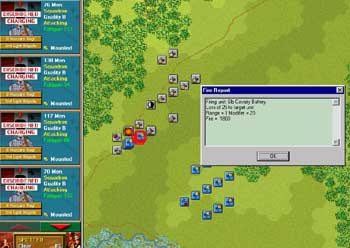
As they come adjacent they are fired on by another battalian of Grenzer infantry. The result is twenty-four
more troopers down. So far a total of thirty-five troopers have been hit.
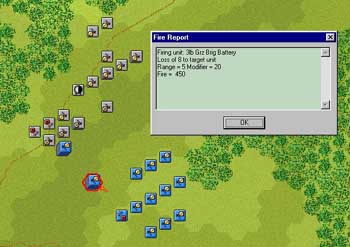
Now on comes the next stack of light cavalry. That Grenz battery sees them coming and
hits them for eight troopers. No disordered cavalry yet.
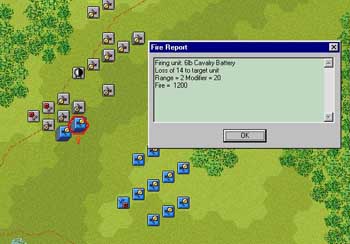
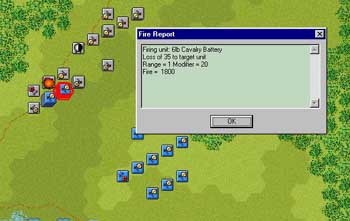
Now an Austrian 6lb battery adds its weight to the battle. Twenty-one troopers fall.
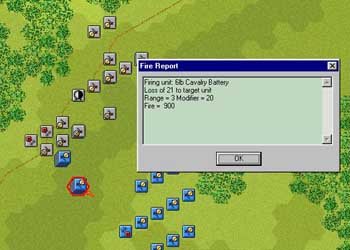
As the cavalry advance further they are hit again for thirteen more losses from the 6lb
battery.
The Grenzer battalian adds in for four troopers down.
And again the second battalian adds in some more losses. Eight troopers fall.

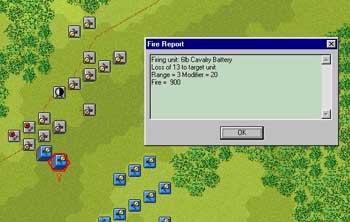
The cavalry come adjacent and the sparks really fly! The 6lb battery hits again for fourteen
troopers.
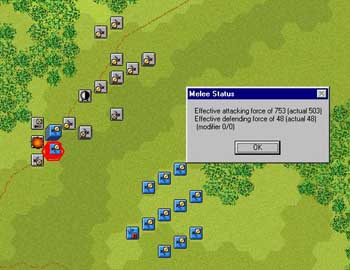
The cavalry will attempt to close. Here are the melee odds. Note the
tripling of the strength.
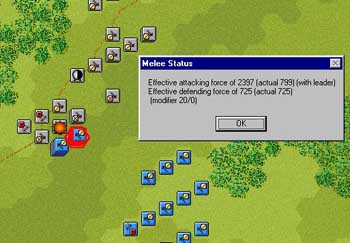
The Grenzers fire for sixteen more losses. This stack has suffered a total of eighty-four troopers
before they could close!

The result of their ride through a hailstorm of lead - a victory! The cost was higher
though than the losses the Defender took. Note that they can continue to advance.

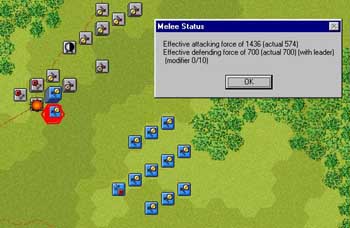
Now we switch over to the other stack to see how they fare in their first attack.
Note the tripling of their strength. Just over 2-1 odds. They don't have a leader
so they will be at a slight disadvantage.
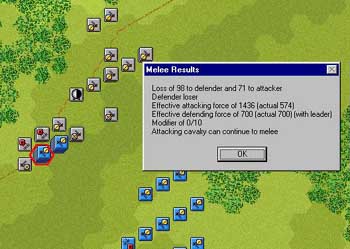
Their ride for glory was not in vain. They crush the defenders and ride on
for more fighting.
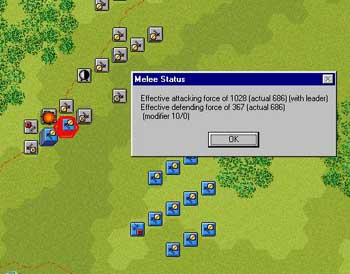
We switch over to the first stack. They follow up their melee. Here are the
odds again. Note they are tripled and then halved for being disordered.
They are fired on as they attempt to close with the gun. The cavalry suffer
a loss of twenty-eight riders.

Here is a view of the state of those squadrons. They get hit again for twenty-five more losses.
And again for more losses!
The result of the melee is another victory for France and a battery overrun.
Note that the presence of the infantry didnt stop the melee. Since there was
a defender that hadnt been attacked (the battery) then a melee could take
place. Had there been only defenders that had retreated from previous melees
then the cavalry would not be able to attack them.

Meanwhile, now on to the last followup melee. We switch over to the left
stack and here are the odds.
This time that 3lb battery was silent in opposition and they get overrun. This set of charges is
over but there are more French cavalry to fight with!

[Written by Bill Peters.]
